Elie Bay and the surrounding area of the East coast of Scotland (Part 2 of 2) |
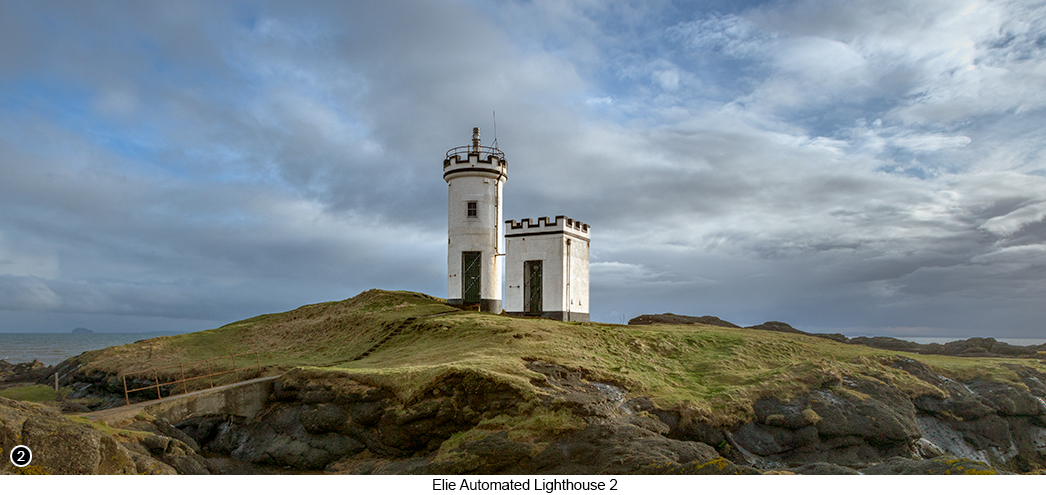
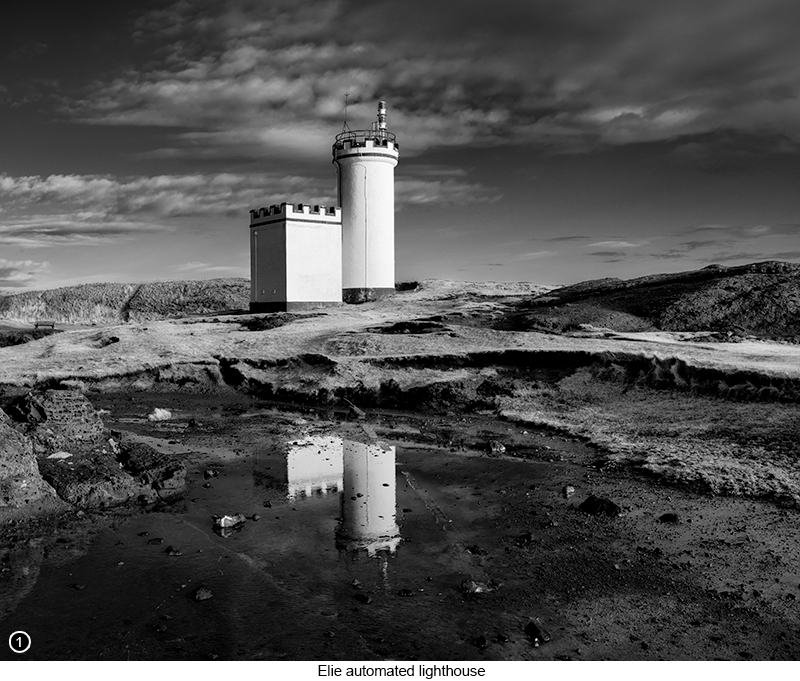
Continuing on from the pretty little harbour village of St Monan's (as discussed in part 1 of this chapter) and travelling just a few miles further South along the coast, you will soon arrive at the slightly larger, but just as interesting, coastal village of Eile on your left. The small automated lighthouse on the edge of the village of Elie, as shown in SHOT 1 below, sits on an area of land that juts out into the sea, which is known locally as "Fish Rock". This small, castellated lighthouse, was originally completed in 1908, after many crews from passing vessels of all nationalities, began to lodge complaint after complaint, with the UK maritime authorities in London. That even though this coastal area of the Firth of Forth, was well known to be extremely hazardous to shipping, with its many hidden, just below sea level rocks (hence the need for the 'Chair of Refuge', as discussed below). There was still no way to quickly gauge, just how close in to the shoreline and those dangerous rocks they were sailing. So after the maritime authorities kept turning a deaf ear to their complaints and refusing to do anything about it and suggesting that mariners, could instead gauge how far they were out from the coastline, by using the beams being emitted from the much larger lighthouses, situated on the Isle of May and at Inchkeith Point. But which the Maritime authorities still hadn't realised and refused to even consider, was that the beams from the Isle of May and Inchkeith Point lighthouse, could not be seen very well from this point and not at all in bad weather, when they were most needed. So begrudgingly it seems, the Maritime authorities finally gave in and had the smallest, cheapest and weakest beamed lighthouse they were able to commission, built on this spot at Fish Rock. Yet when it first got turned on, the beam it gave out, was far too weak to be of any use, at a meager 2,000 candle power. So the complaints from the passing vessels continued to come in and shipwrecks occur, because in bad weather, the sailors still couldn't see the beam, or how close they were in to the rocks. So it was finally agreed, that the power of the beam be upgraded by tenfold and increased to 20,000 candle power. As well as to incorporate, a more modern type of revolving optical fresnel lens, with a beam rotation time of 6 seconds. Then in 1909, not long after the upgraded version of the light was first turned on, it was reported by the local press, that “the light is now a powerful one, which is giving satisfaction to sailors”. Then in 2010, this tiny lighthouse was restored back to its former glory, as well as becoming fully automated. Then in 2013, the control and maintenance of the lighthouse, was taken over by the Forth Port authorities. |
|
 |
|
How to get there: To get to the village of Elie from the village of St Monan's, first drive back up and out of the village of St Monan's, then turn left onto the A917 heading towards Elie, around 2 and a 1/2 miles further on, Street View, Map View. You will then come to a left turn off the main A917 road (named Wadeslea Road), that leads you into the upper part of the village of Elie - the road is marked with a 'No Through Road' sign and doesn't look as if it's going anywhere, other than the back of a small housing estate. The road is not signposted from this direction, so has no indication that it leads to a large, official car park with toilet facilities. As well as to several sites of great historical interest and many coastal walks, with fantastic views. So perhaps the local authorities don't want you to know about this area for some reason. But anyhoo, you know about it now, so take this left turn down Wadeslea Road, Street View, Map View. Now continue down Wadeslea Road and follow it around a couple of bends to the right, until you arrive at another left hand turn at the side of a field and an unnamed road, Street View, Map View. Take this left turn and head down to the 'Ruby Bay' parking area at the end of it, Street View, Map View. You should now be able to see the Elie automated lighthouse, off to your left at the end of a small spit of land and the path that leads across to it. So grab your gear and your wide angle lens (as this is the lens you will be mainly using) and set off down the path towards the lighthouse, as shown in SHOT 1 above and SHOT 2 below. |
|
|
|
| There are many different angles of view you can find to shoot this lighthouse, with perhaps the least obvious being, looking in towards the landward side of the bay, instead of looking out to sea, as shown at the top of the page in SHOT 1. Which I did of course shoot (sort of), as shown in in SHOT 2 immediately above, along with many others viewpoints all around the lighthouse. But the view directly out to sea from this point (when I was there at least), was also taking in the large oil drilling platform dismantling dock, a little further around the coast to your right and which I just couldn't exclude, or incorporate into my seascape compositions successfully. But you might have better luck and be able to make something, of these enormous metal structures in the background. Or if they have been moved, frame them out altogether, but I couldn't and believe me I tried. | |
 |
So head on down towards the lighthouse now on your front right and where you will soon arrive at a path, that leads down to the lighthouse and a small concrete bridge. But before crossing the bridge to get closer to the lighthouse, if you take a short detour down onto the beach to your right, you will then find you can nicely frame up the lighthouse against the sky, sitting on top of Fish Rock, as shown in SHOT 2 above. I then walked over the small bridge and wandered around the lighthouse, looking for my next composition and what I could find of interest to frame it against. But then after finding a small puddle, towards the front seaward side of the lighthouse, I knew I could capture it with a reflection, as shown in SHOT 1 above . Which if you know me by now, then you should already be aware, how I am a bit of sucker for a reflection and can never seem to leave one unphotographed, if ever I see one. But if I am being totally honest, I also found myself in a bit of a rush to shoot the lighthouse and far more interested in moving onto the The Lady's Tower. Which you will now be able to see from where you are standing, near to the lighthouse. As the really interesting looking ruined tower surrounded by waves, that sits above another small bay, just a little further up the coast. So with only a couple of worthwhile shots of the lighthouse in the bag, I hurriedly packed up my gear and moved on. But perhaps after looking at these picture of the lighthouse above and seeing the photographic potential of this scene, you will not do what I did and rush through this view. But instead, allow yourself a lot more time to shoot here and to really work this scene, for everything it's worth. |
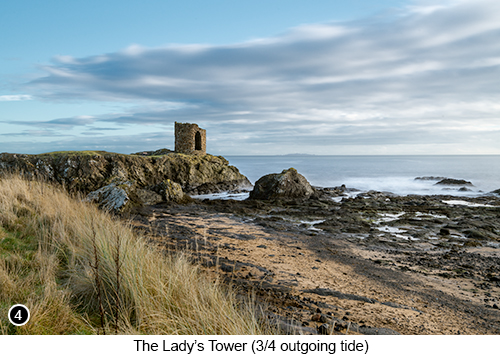
Because I am sure this little lighthouse could look amazing, at both dawn and at sunset. Or perhaps even a night shot, with the stars arcing across the night sky above and with its powerful greenish coloured beam, shining directly out to sea. So having now worked the lighthouse view for all it is worth, if you carry on walking, just a couple of hundred yards further North up the coastal path, with the sea now on your right, a view of which is shown in SHOT 3 above. You will then come to the next location, in this mini photo guide and to the very photogenic, 16th century ruins, of what has now become known locally and historically, as the "Lady's Tower". This semi ruined, single turret styled structure, sits right on the edge of the coastline, in an area called Ruby Bay and is perched directly above some interesting low lying rock structures, as shown at a 3/4 outgoing tide, in SHOT 4 on the right. You will also see there is a grass covered bank that leads down to the rocky beach on your right. So look for a way down to the beach at low tide, via a short but steep, ill defined path. But before I went down this ill defined path, I decided to grab a shot of the scene from the main upper pathway and the view of the tower and the surrounding coastline, as shown in SHOT 4 on the right . The lady in question and for whom the tower was built in the early 1700's, was the Lady (Jenny) Anstruther of the Anstruther family. Which at the time of the tower being built, was by far the the most wealthy and influential family in the county of Fife. |
 |
 |
|
But it is also said, that Lady Anstruther, actually came from much more humble beginnings, as the daughter of a local tinker family - with 'Tinker' being the much older name for a Gypsy. However for all her humble beginnings, she was said to be the most beautiful woman in the county, as well as being exceedingly willful of mind and very demanding. But none the less, the current lord of the Anstruther family, after seeing her only once, as he rode through the nearby village of Balclevie. Instantly fell head over heals in love with her and asked her to marry him, which she agreed to do, to much rejoicing and celebrations within her village, as well as the surrounding area - poor girl done good, etc. But soon after the marriage took place and now drunk with the power of her newly found status, at the head of the richest and most influential family in the region. She demanded that the entire village of Balclevie, be totally demolished and all its inhabitants evicted from the area, as quickly as possible. Her excuse being, that the village was blocking her view of the sea, from the Anstruther House she now resided in. As well as its inhabitants looking poor and unkempt and reminding her too much of where she came from. So on her orders, all the villagers of Balclevie were immediately evicted without notice, or recompense, as the village and everything they owned within it, was totally raised to the ground. With whatever little remained, then being dug back into the soil over the following days. There was even a poem written by one of the evicted locals, that refers to a curse they put onto Lady Anstruther, soon after this punitive act of societal cleansing took place: |
|
Balclevie was a village fair, |
 |
Lady Anstruther was also known to be something of a "flirt", who very much enjoyed being in the company of a series of young men and with whom she would often bathe naked in the sea. So to this end, she had this gothic looking tower, built at her favourite skinny dipping location. Just so she and her various guests, could enjoy their naked frolics undisturbed and whenever it took her fancy. To then return to the tower afterwards to dry themselves off (etc!), by making the most of its large hearth and raging log fire. She also demanded that the local village church bells at Elie, would ring out continuously during her skinny dipping sessions, to warn away anyone from the village of Elie, who might be fool enough to come to the tower, to see what was going on. But unfortunately I was unable to find out any more information, regarding what punishment she had meted out to anyone, who got caught near to her tower, when she and one of her men friends were doing their 'thing'. But the fact that she had an entire village obliterated and all its occupants evicted out of the area, just because they made her feel uncomfortable and their houses spoiled her view, I can't imagine it would have been anything too lenient. |
|
 |
|
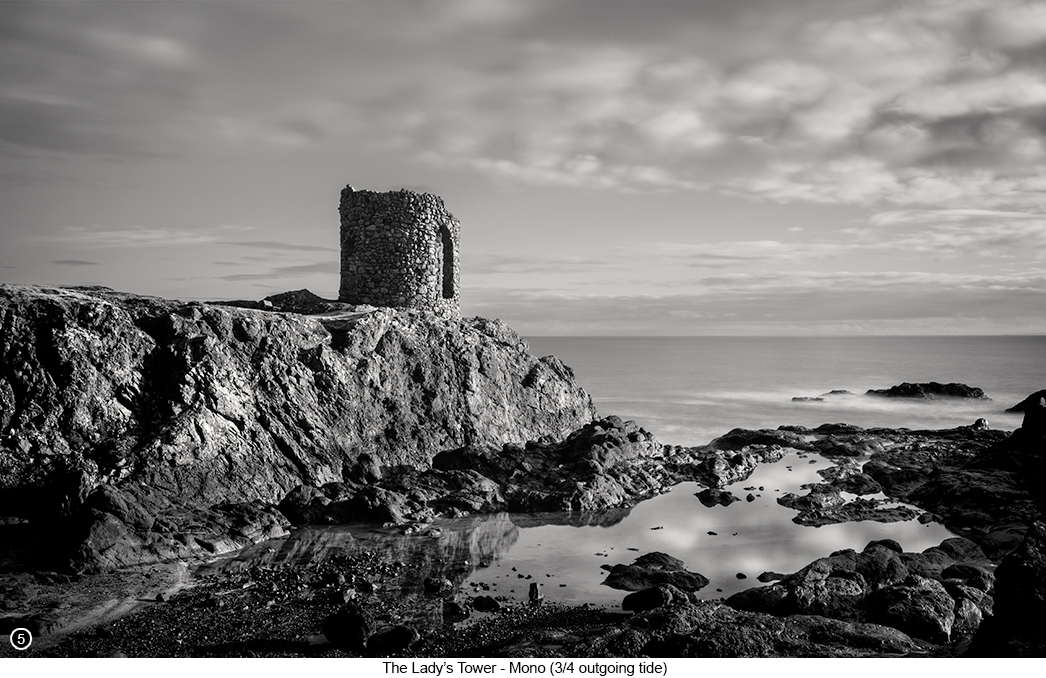
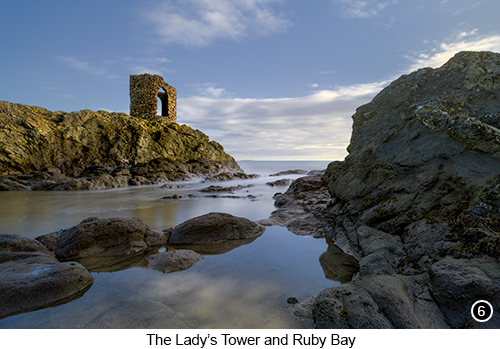
..and now back to the photo guide. I then walked across the seaweed strewn beach towards the tower, where I found this nice little inlet next to the tower on the right. Where I then setup my camera as low down as I could to the water, to shoot it from there, as shown in SHOT 6 above. The reason I chose to go for this low down shooting position, was to create the effect, of raising the tower up in the frame, to make it look more grandiose and isolated. But at the same time, it also allowed me to place the front element of my lens, within the shadow of the rock to my right, to avoid any chance of flaring. I then setup my composition, with the main weight of the tower, near to an upper compositional third. I then threw on my 10 stop ND and went for a long exposure of 30 seconds. Which I knew would flatten out any of the small waves and ripples, that kept lapping into this tiny inlet from the sea. I then moved around the tiny inlet to my left and setup my tripod for the next shot, on some slightly higher rocks, for a slightly more elevated view. I still had my 10 stop on my wide angle lens, so once again went for a 30 second exposure, as shown in SHOT 5 above. |
|
 |
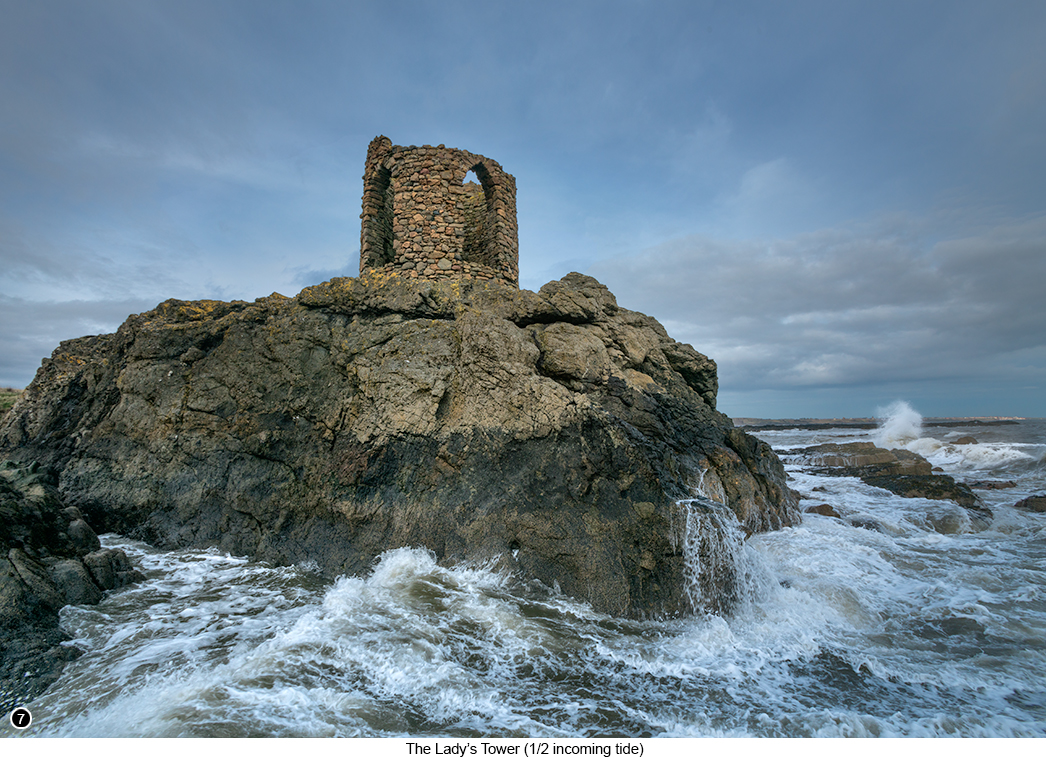
Then on another short visit to this location several weeks later, after reviewing the images I had already taken on my previous trip. I knew I needed to go back on a windy day and shoot the Lady's Tower at a rising mid tide, where the waves would be crashing, around the base of the rocks beneath the tower, as shown in SHOT 7 above. To get to this particular viewpoint, you need to walk down onto the beach and across to the small bay area to the right of the tower. Where you will see a large seven foot high column of rock, standing on the right side of this tiny bay (as can be seen on the middle right of SHOT 4 above). If you then make your way around this rock to the right of it, you will then come out to a large, flattish shelf of rock, that sits a few feet above the incoming waves at half tide and a much more dramatic view of the tower. Now I hope it is doesn't need me to say, that if when you are here, the tide is over 1/2 high and coming in fast. Then to go around this rock in an attempt to get to the above viewpoint, would be quite frankly silly, as well as suicidal. As this flattish area of rock, becomes completely submerged at anything even slightly above a 1/2 incoming tide. So assuming it is half tide and you safely managed to get yourself into this location, as shown above in SHOT 7. Then what I did, was to move in as close as I could, to the channel of water nearest to the front side of the rock and wait for a wave to roll in, as I shot it as wide as I could with my 16-35mm lens. I went for this close but wide method, because I wanted the tower, as well as the rock that it stands on, to look as if they were totally surrounded on all three sides, by the foaming waves of the sea. So even though the channel of water in front of me was quite narrow, the dramatic effect that I could create, by getting really close into it, works very well I think. |
Once you have finished shooting the automated lighthouse and the Lady's Tower. If you go back to your vehicle in the Ruby Bay car park and drive back out the way you came in and back onto the A917. If you then turn left on the A917 and look out for a soon arrived at turning on your left, that leads into the village of Elie. Which has a brown tourist information sign at its entrance, saying Elie Harbour and Public Toilets, Street View, Map View and take this left turn. Now follow this road until you reach the harbour wall and a 'T' junction with Toft Road and take a left. Then drive all the way around the bay, as it arcs away to your right. You will then come to the official Toft road car park at the end of this road, after driving through some blue gates, Street View, Map View. Continue on down Toft road towards the harbour wall, for as far as you can and then into the fee paying car park on your left (it was only £3 when we last visited) and park your vehicle there. You will now have a view back towards the Elie automated lighthouse, from over the car park wall, as shown in SHOT 8 above. But what you will not be able to see, is where I took the shot of the "Chair of Refuge", as shown below in SHOT 9. So to get to the exact location where I took SHOT 9, if you walk towards the harbour offices on your right from the car park and then past the offices and all the way to the harbour wall, Street View and turn right, as you continue to follow the harbour wall all the way to the end. You will find that there is an area at the very end of the harbour, where the harbour wall finishes, about 4 foot before the end of the harbour itself. Which means you will then have an unrestricted view, straight out to sea and the Chair of Refuge itself, sitting near to the horizon. |
|
 |
|
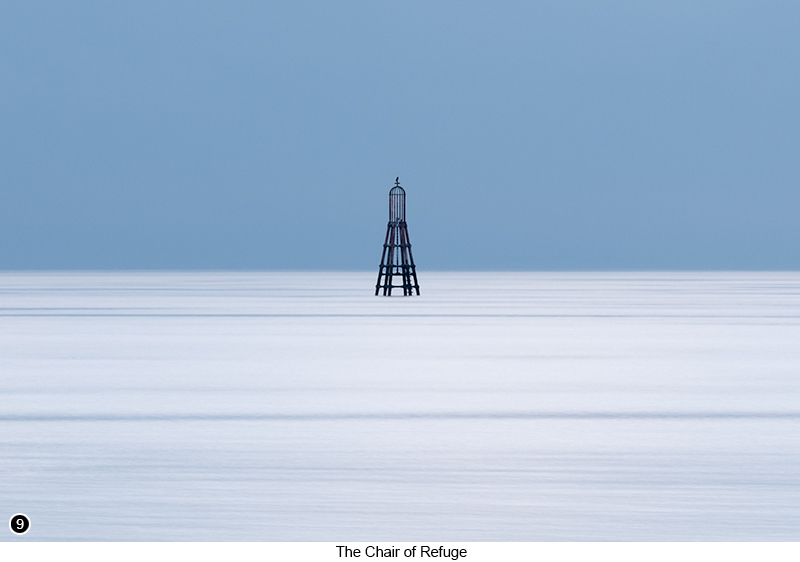
It was decided by the local community of Elie, that the Chair of Refuge (originally known as the "East Vows Beacon") be erected upon the infamous "Vows Rocks" in 1846, due to the mounting number of shipwrecks, that kept occurring on these tidally submerged rocks and with far too many people losing their lives as a consequence. Which I also assume, is why the Vows Rocks were given such a religious sounding name, because of the number of funeral services taking place, in honour of the many shipwrecked sailors, who kept losing their lives here. The Chair of Refuge is made from wrought iron and was designed to stand up to and against, the worst that any weather or storm could throw at it. It also has a caged refuge platform mounted on top of it, that was designed to always remain at least 8 feet, above even the highest of spring tides and be large enough to accommodate upto 10 shipwrecked mariners. One of the iron supports, which you can see towards the bottom right of the beacon in the shot above. Was designed to also act as a ladder, that would allow survivors of a shipwreck, to climb up to safety within the cage and await rescue after the storm had passed and the waves had receded. If you want to get your version of SHOT 9, as shown above, then you are going to need to use a long lens of at least 400mm and a 10 stop ND. Or, you could do as I did and throw a 2x converter onto a 70/200mm zoom. Which I found myself having to do, due to not bringing my 150mm to 600mm along with me, as I didn't think I was going to need it. But even though 400mm was as far as I could go optically, I still felt that I needed to crop into the image even more when I was processing it. That is if wanted to get the final image, to look anything like I wanted it to be when I was shooting it. So what I am saying here is, that the shot you are looking at immediately above, I would guess is equivalent to the framing I could have got, if I had brought my 150-600mm lens with me. However, if I had brought along my 150-600mm, then I wouldn't have been able to use my 10 stop ND filter. As the front element of my 150-600mm lens, is far too big for any 10 stop ND filter that I am currently aware of. So you win some you lose some I guess. When we first drove into the Elie Bay area from the main A917 road, it was the end of the day and the light was sort of flat and uninspiring and there was also a big rain storm brewing on the far horizon and heading towards us. It was about 20 minutes before the sun would be setting, somewhere behind that distant gloom. Yet there was a small hole in the gloom above and a single patch of ocean, being brightly lit to the left of the Chair of Refuge. But unfortunately for me, this patch of light, was way over to the left of the of the scene and nowhere near to the front of the Chair of Refuge, where I wanted it to be. Yet instinctively I knew there was definitely going to be a shot here, if only I could get myself around to the left of the scene and so move the patch of light to the right and in towards the front of the Chair of Refuge. But how could I achieve this? Well in the usual landscape photographer's headless chicken sort of way, I floored the accelerator and drove as fast I legally could (cough), around the bay to the left and then onto the harbour itself and as far as I could down to the end of it (ignoring all the "Official Vehicles ONLY past this point" types of sign, which as we all know, do not apply to landscape photographers in headless chicken mode, only normies). I then leapt out of the car with my gear and scuttled down to the end of the harbour wall and setup my kit, as quickly as I could. To wait breathlessly, with my finger twitching on the remote release, for the pool of light to hove into view. And sure enough, the patch of light continued to slowly move to the right and exactly into the place that I wanted it to be. Where I then hit the release button, to grab a 30 second exposure. Then another. Then another, as the patch of light continued to move to the right, before finally begining to fade and then disappear. What, a, buzz!!! My good wife (God bless her) had stayed with the car, but then moved around to the drivers seat, before driving it back out of the restricted area and into the official car park and paid the £3 parking fees. So that is about all I can tell you, of the many photographic delights you will find, when you are here to shoot, the ridiculously photogenic villages of St Monan's and Elie. |
|
 |
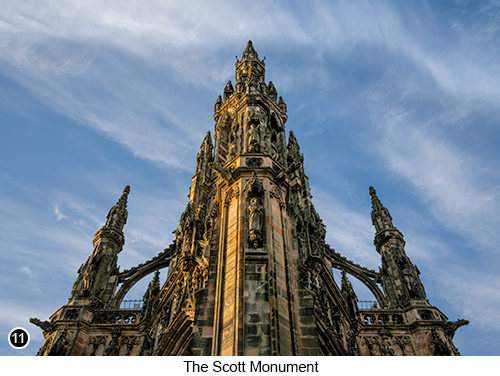 |
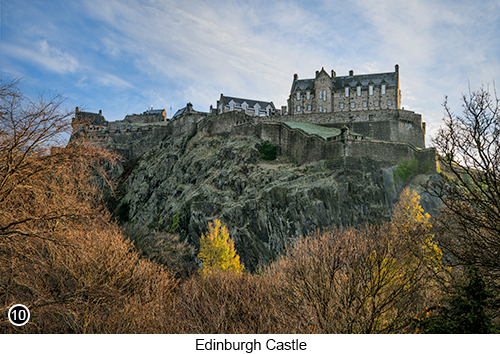
But before you go, there is one more area that you might find interesting and somewhere else, I think you should go with your camera. And that is, if you look across the bay to your right, from either of these coastal villages, you might just be able to make out the suburbs, of the City of Edinburgh on the opposite coastline and which is somewhere, you should definitely consider going for a few hours with your camera. I mean you might as well, as you are already in the vicinity of this city, which is only about a 40 minute drive from where you are now standing. It is also a city that is easy to find, being the capital of Scotland and where just about every sign on any of the roads in this area, points you in the direction of Edinburgh. So I don't even feel the need to give you links to a map to help you to find it, because as the old saying goes, you really can't miss it. So to round off this two part chapter for the Southern East coast of Scotland, here are a couple of shots shown above (10 and 11), that I grabbed handheld, of two of Edinburgh's more iconic buildings. As we walked along the Royal MIle, after popping over there for our lunch and to do a bit of Christmas shopping. Tip: I also think, that if you could time it to be in Ruby Bay, at the Lady's Tower viewpoint as described above and setup to take your version of SHOT 7. But that you are doing so in the depths of winter at pre-dawn and with a half incoming tide, with the sun rising up directly behind the tower and surrounding it with a nice warm glow. That this would make for a really amazing shot of this scene and something you would definitely want to add into your portfolio. So even though I haven't done this for myself yet, I know I am going to try to at some point and which is now a shot, that is sat very high up on my 'Photography To do' list. I will also probably bring along some light with me, so I can throw some detail and warmth onto the front of the tower, just to balance it out against a dramatic dawn sky. Oooh, now wouldn't that be a fine image to make? |
|
Exif information for each of the numbered shots shown throughout this chapter --1 - Canon EF16-35/2.8L USM, 1/25 Sec, f/16, ISO 100, Focal Length 16mm, taken on 6th Jan at 12:31 --3 - Canon EF16-35/2.8L USM, 1/250 Sec, f/14, ISO 100, Focal Length 17mm, taken on 6th Jan at 12:52 --4 - Canon EF16-35/2.8L USM, 20 Sec (with 10 stop ND), f/16, ISO 50, Focal Length 35mm, taken on 6th Jan at 12:56 --5 - Canon EF16-35/2.8L USM, 30 Sec (with 10 stop ND), f/16, ISO 50, Focal Length 35mm, taken on 6th Jan at 13:20 --6 - Canon EF16-35/2.8L USM, 30 Sec (with 10 stop ND), f/16, ISO 50, Focal Length 26mm, taken on 6th Jan at 13:12 --7 - Canon EF16-35/2.8L USM, 1/125 Sec, f/14, ISO 100, Focal Length 16mm, taken on 3rd Mar at 15:37 --9 - Canon EF70-200/2.8L IS USM + 2x converter, 30 Sec, f/8, ISO 100, Focal Length 400mm (cropped to around 500mm), taken on 2nd Dec at 15:16 --10 - Sigma 24-105mm F4 DG OS HSM | Art, 1/200 Sec, f/11, ISO 100, Focal Length 46mm, taken on 3rd Dec at 13:24 --11 - Sigma 24-105mm F4 DG OS HSM | Art, 1/200 Sec, f/13, ISO 100, Focal Length 24mm, taken on 3rd Dec at 14:06 |
|
If you have enjoyed reading these 'Extra' chapters to my Guide Book and think you might also enjoy reading 79 more chapters across 270 pages, that also includes more than 340 Fine Art quality images, along with detailed descriptions and large scale maps to guide you to the exact location of where I took each and every one of them and which then goes onto discuss the techniques and tools I used to process them, but where everything is written in plain easy to understand English? Then please consider buying the Book. |
|