Glen Garry and the River Garry |
Glen Garry, which is skirted along its right side for several miles by the main A87, is none the less a relatively remote area of Scotland, that is seldom visited by anyone other than the local dog walkers who live near by, as most visitors to this area will usually drive on past at high speed, as they try to complete their long journey North towards to the Isle of Skye and the North West of Scotland. And which is absolutely fine by me, because that means is I can go here with my camera knowing that I will probably be on my own and be able to spend several peaceful hours, photographing my way along the banks of the River Garry in almost perfect isolation. As I listen to the occasional passing vehicle full of holidaymakers, gearing down ready for the steep climb up to the top of the Glen Garry ridge with (as I imagine) their children in the back, continuing to plead for a positive outcome to that age old question after nearly 10 straight hours of asking "Are we there yet?" There are lots of photographic opportunities in this area yet relatively few places to stay, as there isn't much of a local population that lives around here, other than a few roadside B&B's and hotels. So if you want to photograph in this area for more than just a passing visit, then I suggest you try to pre book some accommodation close by for maybe 1 night, at either Invergarry which is close by, or Spean Bridge which isn't as close, but just a few miles back down the A87 heading towards Fort William. |
A Scottish Winter Poem Aye I love my Scotland Aye the weather here is wonderful .....................................Unknown |
 |
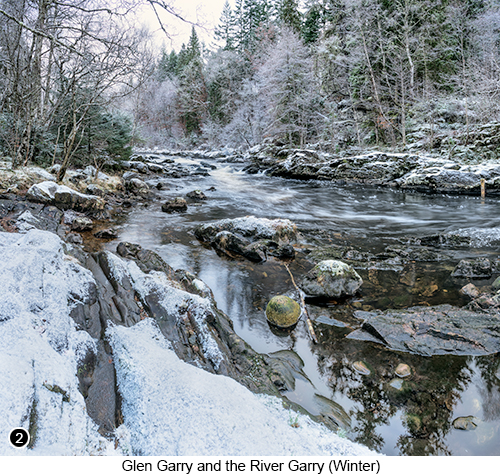 |
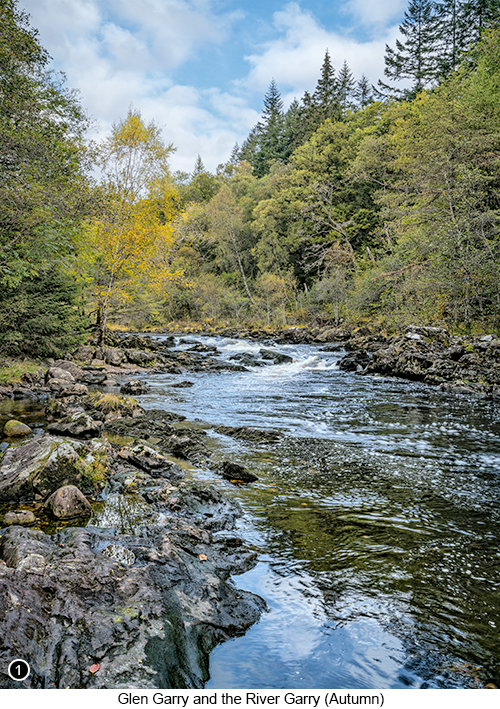
How to get there - Heading back South from the North West of Scotland along the A87 towards Fort William, you will eventually drive over and then past the Loch Loyne and Glen Garry Viewpoint (described in more detail throughout Chapter 71 starting at Page 224 of my Guide Book) and then on towards Invergarry. Where about five miles further on from the top of the Glen Garry Ridge, you will see a sign on your left that points towards an official parking area on your right, that leads down a short gravelled track to the River Garry, so turn right here Street View, Map View. Drive down this short track until you quickly arrive at a short flat single vehicle width bridge, with a two tiered parking area situated on the opposite side of the river and park wherever you can over there. Then having left your vehicle, walk back towards the bridge and locate the wooden stairs (there are two sets side by side) that take you down to the edge of the river on what is now the left hand side of the bridge, for the viewpoint shown on the left, above and below in SHOTS 1, 2 and 3. |
|
There is an ancient legend which describes an evil black phantom dog that is said to continually stalk the woodlands next to the rivers in Scotland called the "Barghest", or the "Dog of Darkness", which is said to be a huge shape shifting beast with burning red eyes, blood soaked fangs and razor like claws. Which even if you manage to get away from it after it attacks you on sight, that any wounds it is able to inflict upon any part of your body, will never heal and will remain open until you die of the infection shortly thereafter. It is also said that even just spotting a glimpse of the Barghest from out of the corner of your eye as it lopes through the forest, or hearing its blood curdling howls as they echo through the distant trees, should be taken as a portent of your own imminent demise. The legend of the Barghest, is thought to have originated from an ancient practice that is known to have once taken place within certain areas of Scotland and other regions of the UK, whereby every time a new village was becoming established and where a new graveyard was also going to be needed, that the villagers would first have to install a 'Guardian of the Dead' to look after their corpses and to stop the Devil from forcibly taking possession of their newly released souls. So the villagers would first have to locate and then bury, the largest and most ferocious dog they could find in the centre of the new graveyard, to act as their perpetual 'Guardian of the Dead' and who they then believed would spend the rest of eternity, protecting their souls from being stolen by the Devil. The name Barghest or Barguest, is thought to have been originally derived form an old Germanic phrase, meaning the Spirit of the Bier or the Coffin. |
|
 |
|
|
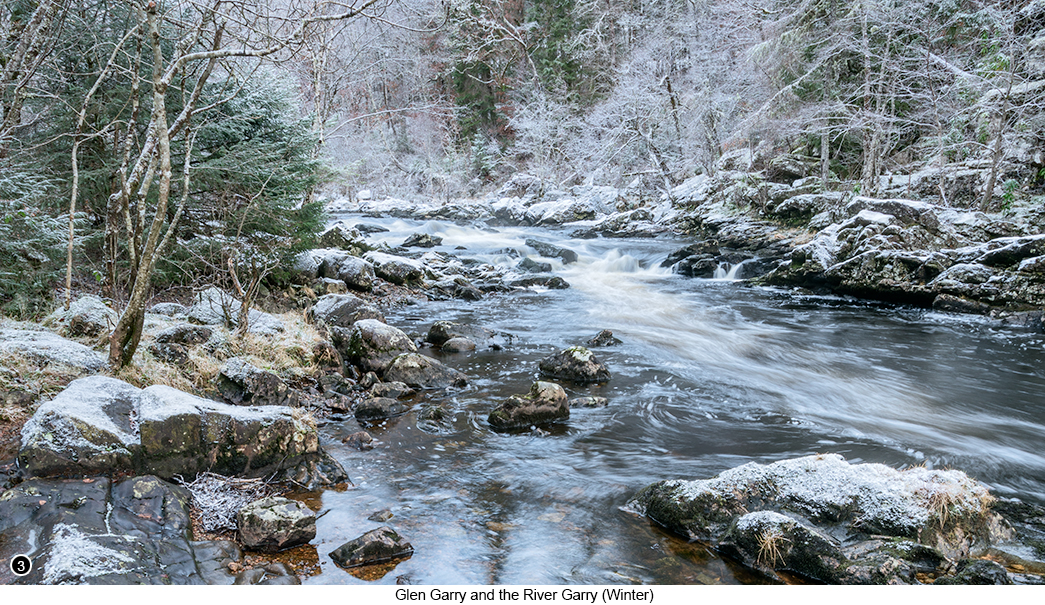
..and now back to the photography - So having located the wooden steps directly at the side of the flat single width bridge and having walked down to the edge of the river, you will see the view as shown in all of three three images above. Yet from where you are now standing, you will also find that there is very little room to move around within this location without actually stepping into the middle of the river, so your choice of framing is going to be quite quite limited here and so you are going to have to get creative and work with what nature is offering you at the time you are there. Oh and you will also probably have a very wide range of light levels to deal with here, due to the deep shadows being cast by the tall trees standing all the way up and along to the edge of the river on both sides, as well as there being a very bright 'V' shaped section of sky in the upper middle of your frame. So how do you go about successfully controlling such a wide dynamic range in a scene such as this and that doesn't look obviously processed? Well there are four different ways I have found that I can use to overcome these wide dynamic range problems: (1) - Use exposure bracketing to extend your dynamic range and then blend your bracketed shots back together later on the computer, as I did for SHOT 1 . This method can work really well, but only if there is little to no air movement and the leaves and branches are not blowing about all over the place and moving between shots. So if it is calm day when you are here and you know how to successfully bracket and blend your shots, so that no one is able to tell that you have done so (do I need to say that I have gone into great detail in my book, about how to shoot and then seamlessly blend multiple exposures and pano's etc? Because I have...) then go for this method, but don't then go and ruin it by making your final image, look like one of those horrible HDR monstrosities that can be seen online. Instead try to create something that looks as real as your eyes were able to see it at the time you were there and with the same level of dynamic range that your eyes could cope with. In other words, if your eyes could see details in the darkest of the shadows as well as the brightest parts of the sky, then your image should reflect that, but nothing more than that if you know what I mean. (2) - Use a 2 or 3 stop soft ND grad filter. Now even though most of the photographic community and online vloggers etc., seem to be constantly telling us that this is the only way to go about trying to tame a scene with a wide dynamic range, it isn't, in fact this is the absolute last option I ever choose to use. But if you are a dedicated ND grad user, as quite a few landscape photographers are it seems, then why not try doing this in a way that will mitigate that darkening effect across the upper third of your shot and that you are pretty much guaranteed to get across the tops of the trees in a scene such as this and which doesn't look very good if we are being honest, because it is so obvious what you have done. So instead of mounting your grad into its unnecessarily expensive mounting bracket, try dispensing with the bracket altogether and hand holding the grad in front of the lens instead and then feathering its darkening edge effect, by moving it up and down in front of your lens as you take your shot. Now this does take a little bit of practice to pull off successfully and can feel very awkward the first time you try doing this, so this is how I do it when I have no other choice other than to use a grad. I will set up the shot as usual and set the exposure for the shadows. I will then look through the viewfinder at the scene in front of me and using only my forefinger and thumb to hold the very bottom two opposite corners of the grad, I will then place the grad just in front of the lens where it needs to be and as near as I can to it, but without touching the front of the lens to make sure I am not moving it and blurring the shot, as I then move the grad up and down vertically in front of the lens as I take several shots, with the intention of keeping only the best shot where the grad effect isn't so obvious. Yes I know it is awkward doing it this way and it may take you quite a bit of trial and error before you begin to see the benefits of doing things this way, but I do believe this really is a technique that is worth persevering with, because when you do get good at it and you will, then no longer will you have to spend so much time on the computer, trying to process out that darkening line effect that you are always going to get, whenever you use a static, bracket mounted grad filter. - Trust me and just give this technique a go the next time you are out, because you may be pleasantly surprised at just how good the results from using this technique can be..! (3) - Underexpose by 2 to 3 stops as I did for SHOT 2. Yes I know, doesn't sound like a good idea does it and probably goes against everything you have learnt about landscape photography so far? But you might be surprised at just how much low light detail modern camera sensors are capable of capturing these days. Now you are going to have to bear with me for a moment, because I will have to go into a little bit of technical detail, if I am to explain why underexposing your shots can be such a good idea for wide dynamic range scenes. But please stay with me, because I think this is one of those sweet little nuggets of information that you can occasionally stumble across on the Internet, that can fundamentally change how you approach your landscape photography from this day forth. Now for the techy bit - in the old days and by old days I am talking about all the way back to around 2014 or before, camera sensors were nowhere near as good as they are now. And the main reason they weren't as good, is because back then a sensor would usually have its wiring set above the photosites, which are the little pots where the information from the incoming photons of light are captured. Think of an old style inkwell that is half full of ink for a mental picture of what all the photosites across a sensor looks like. Now if we imagine light coming into that inkwell (photosite) from straight above and how it can easily travel unimpeded all the way down the inkwell to the ink at the bottom of the pot (data capture area of the sensor) and where the sensor is then able to register each photon of direct light accurately, for colour and luminosity etc. But as we all know, light is able to bounce around and reflect off things and be split into different colours (spectrum) like a rainbow, as it travels through all those concaved and convexed elements within your lens. So that any light coming in towards the sensor from an angle (let's say 45 degrees), will find it difficult to travel all the way down to the bottom of the inkwell and hit the ink (photosite part of the sensor) directly and accurately and instead just be lost or registered incorrectly, due to how different wavelengths of light will always travel at different speeds and at slightly different angles and wave depths. So the sensor manufacturers came up with an idea to get around this deep photosite well problem and called it "Back Side Illuminated" (BSI), whereby the wiring for each photosite was then placed beneath each photosite instead of above it, thereby allowing for the depth of the inkwell (photosite) to be greatly reduced and the ink being moved up near to the top of the inkwell (photosite). Which meant that light coming in from almost any angle is now able to hit the photosite more easily and accurately. This was a really good things for us photographers and a major step forward in the technology that we use, because it meant we now had much less noise to deal with, as well a lot less chromatic aberrations and colour fringing etc. It also meant that these BSI sensors could register a lot more lower light particles (photons) directly and successfully and in far greater numbers than before and which meant that even the darkest of shadows, would now have a lot more usable information stored within them. So lifting up all the detail that is now usually contained within the shadows of your shot by a lot, even though you may not be able to see it on screen, no longer means you are automatically going to increase the noise within your image and ruin it, in the same way you would have been pretty much guaranteed to have been doing only a few short years ago. - Trust me again and just give this idea a go as well the next time you are out with your camera..! Now if you are one of those photographers who enjoys delving deeply into the technicalities of how modern cameras work and who would be able to easily and gleefully, pick an argument against various things I have just said, then so be it and I am more than happy to defer to your greater knowledge in this respect, because I am not trying to write a scientific paper here and instead just give your average none technical photographer a layman's overview of what is going on, but in a way that can be as easily understood. So please refrain from firing off that email to me laden with diagrams filled with scientific terminology, wave diagrams and spectrum analysis charts etc., because I am more interested in photography and the 'Art' of photography than the technicalities that lay behind it. And which I think is also the same for your average landscape photographer, who doesn't really need to know how things work in that level of detail, when all they are really interested in is how to take better pictures, but at the same time might also enjoy getting some sort of an idea about what is going on under the hood, when it could help them to take better pictures. (4) - Exclude the sky altogether and try to frame it out of your shot, so you can then concentrate on exposing correctly for the shadows and which is what I did for SHOT 3. |
|
 ----------------------------------- ----------------------------------- |
|
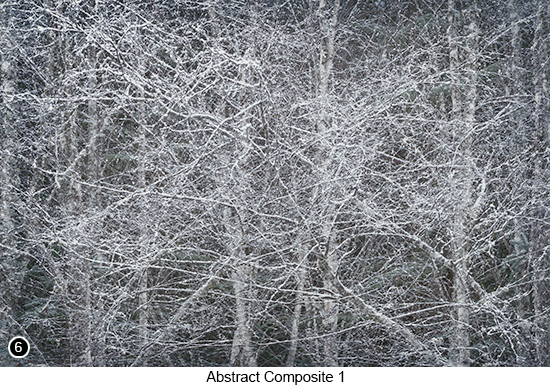
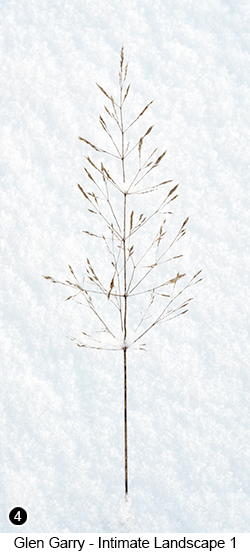
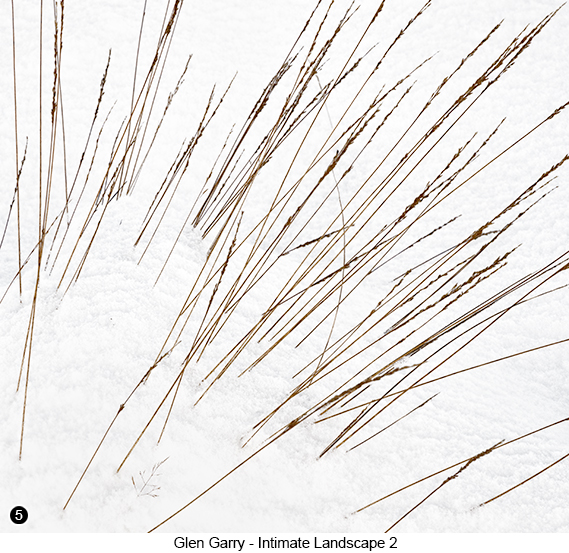
Then having finished working the river viewpoint from beside the bridge, I packed away my gear and went for a pleasant stroll down along the path as it continued through the woods and followed the River Garry along the right hand side of its riverbank. It was around minus 4 on this particular day and a couple of inches of snow had also fallen overnight, so this whole area looked like a beautiful winter wonderland, with everything that wasn't covered in snow, covered instead with a delicate hoar frost. But alas no matter how good it looked, or how many other areas of the river I could have spent several more hours really enjoying myself photographing, I knew I wouldn't be able to climb down the short but steep bank to the edge of the river under these very slippery conditions, without breaking my neck and the line of trees at the side of the path next to the river were too thick to shoot through. Yet I still wanted more, as I felt sure there was so much to photograph here, if only I could make myself see it? So I tried to ignore all the obvious shots down by the river and instead started to look around for something else I could work with that didn't involve the river and that's when I happened to look down at my feet and see these delicate fronds of grass poking up through a solid background of snow and which led to me taking SHOTS 4 and 5, as shown immediately above. And that was it, I was now officially on a roll, as I started to see lots of other photographic opportunities everywhere I looked and which led to me also creating these two 'abstract composite' images of the surrounding woodland, as shown in SHOTS 6 and 7 below. |
|
|
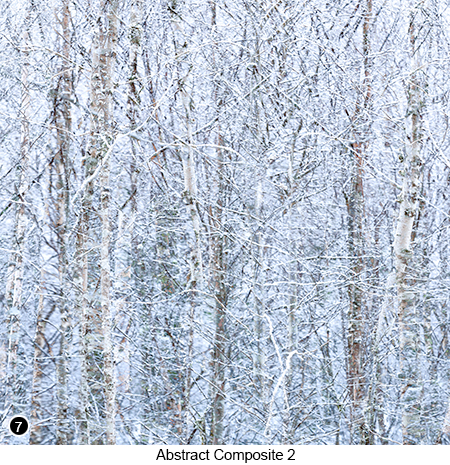 |
--Exif information for each of the numbered shots shown throughout this chapter --1 - Canon EF16-35 f/2.8L USM, 1/4 Sec (+/- 2 stop bracket), f/16, ISO 100, Focal Length 35mm, taken on 14th Oct at 11:44 --3 - Canon EF16-35 f/2.8L USM, 0.5 Sec, f/16, ISO 100, Focal Length 18mm, taken on 3rd Jan at 13:09 --4 - Canon EF24-105 f/4.0L USM, 1/250th Sec, f/11, ISO 400, Focal Length 105mm, taken on 3rd Jan at 13:25 --5 - Canon EF24-105 f/4.0L USM, 1/250th Sec, f/11, ISO 400, Focal Length 105mm, taken on 3rd Jan at 13:35 --6 - Canon EF70-200/2.8L IS USM, 1/3rd Sec, f/11, ISO 50, Focal Length 200mm, taken on 3rd Jan at 14:40 --7 - Canon EF70-200/2.8L IS USM, 0.8 Sec, f/16, ISO 50, Focal Length 200mm, taken on 3rd Jan at 14:42 |
|
If you have enjoyed reading these 'Extra' chapters to my Guide Book and think you might also enjoy reading 79 more chapters across 270 pages, that also includes more than 340 Fine Art quality images, along with detailed descriptions and large scale maps to guide you to the exact location of where I took each and every one of them and which then goes onto discuss the techniques and tools I used to process them, but where everything is written in plain easy to understand English? Then please consider buying the Book. |
|