Invermoriston and the River Moriston Falls - Part 2 of 2 Following the River Moriston further North and back towards the Isle of Skye |
Ever fancied shooting in a beautiful but hidden away location, that just happens to be located only around 30 yards from a main road, yet that as far as I am aware, has never been photographed before? Well stay tuned folks, because I just might have discovered such a location for you to explore with your camera. Enjoy! |
|
|
|
How to get there - Back on the A887 and driving North for around 7 miles (as previously covered here in Part 1), as you head back towards the Isle of Skye and away from the tiny village of Invermoriston, you will eventually arrive at this very short layby road Street View, Map View on your left, next to the River Moriston. At the top of this short side road, you will find what I would classify as the main area of these upper falls and which I covered in my Photographers Guide Book. But I did not cover this hidden away lower section of these falls in the book, because at the time I had completed writing it, this area did not look in any way to be easily accessible to me and was blocked in by a in thick layer of dense undergrowth. However since that time, this area has now been discovered and then opened up by kayakers, who were prepared to hack their way through the undergrowth and forge a path down to the edge of the river. So thanks for doing that for me kayakers. However, you still have to be very careful when you go down here, as even though it is a very short path down to the river's edge, that they have now opened up for us all to use, it is still quite steep and rocky, with the last few yards requiring that you negotiate yourself and your kit, across a fairly steep sided slab of rock, that I am sure will be a nightmare to cross when it is wet. |
|
 |
|
So, as you drive into this short side road and it immediately bends sharply to your right (the semi hidden path you are trying to find, is now directly on your left at this point), you will then see about half way up this small side road, there is enough space to park a couple of vehicles over on the right, close to the small fern covered bank and without blocking off the road for other users. So having parked courteously, if you walk back towards the edge of the main road where you just drove in and look for a not too obvious gap in the bushes on your right and a narrow path that then leads down to the edge of the river. |
|
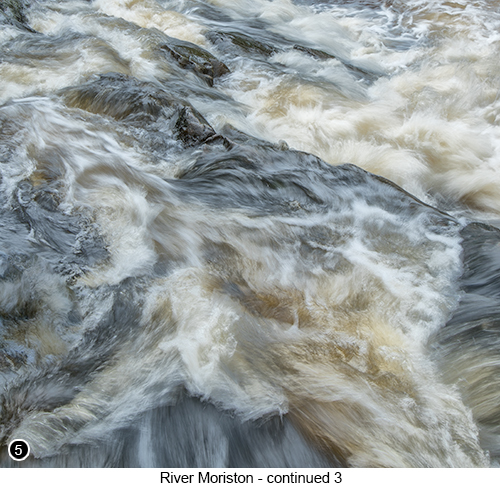 |
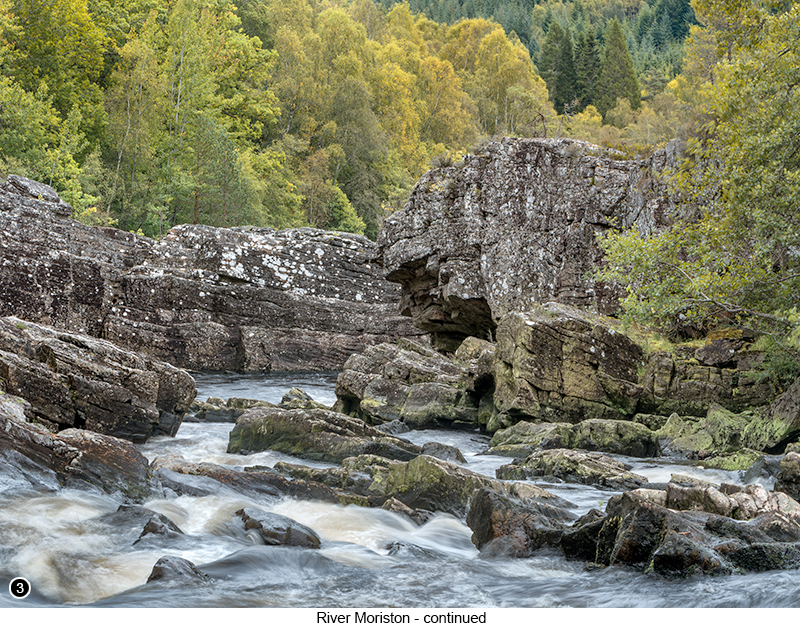
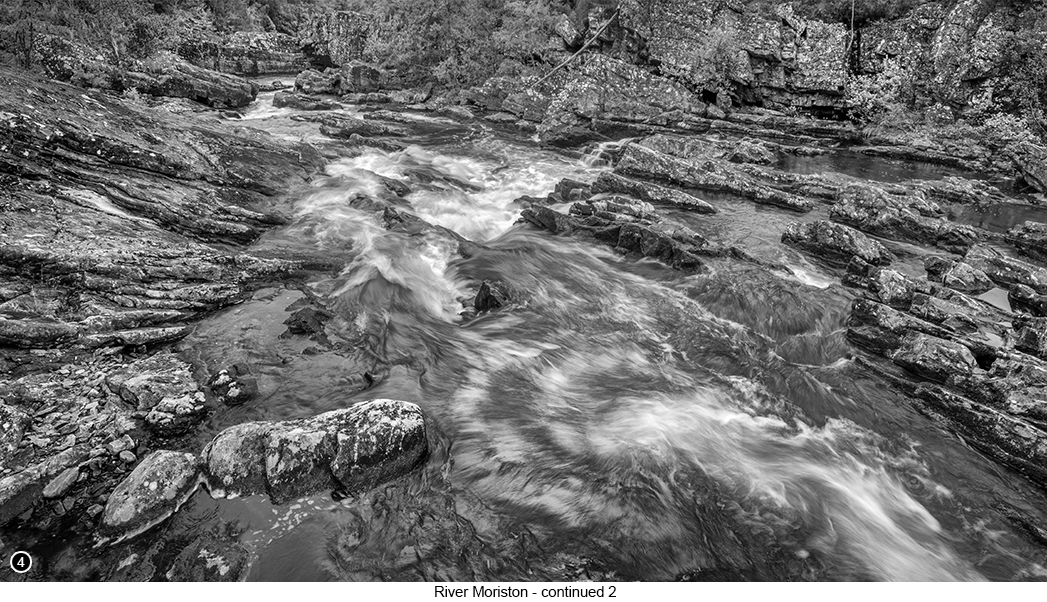
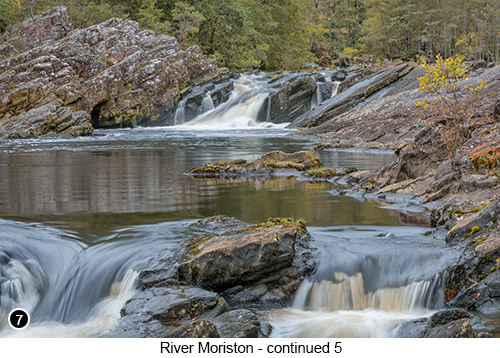
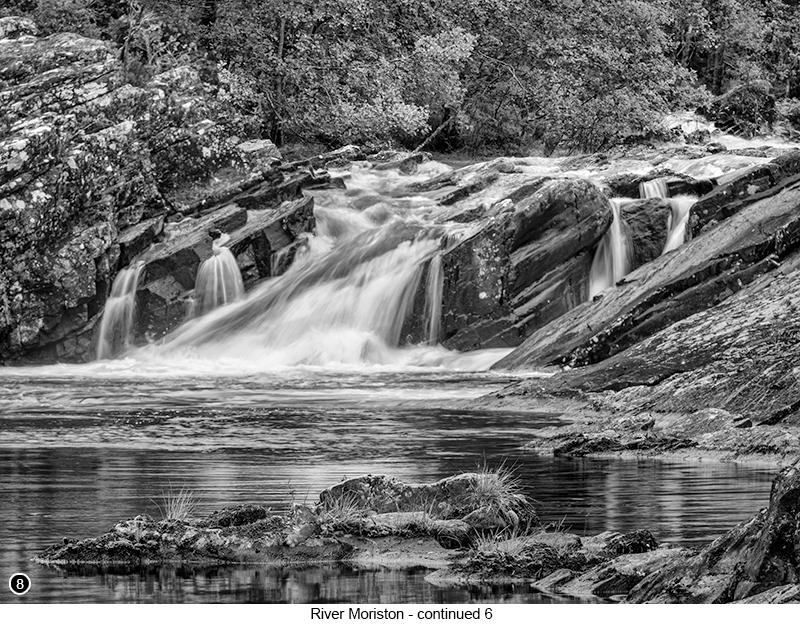
You will then see a few feet further down the path, that there is a small rocky outcrop with a tree growing out of it and how the ill defined path continues on down towards the river to your front right, so continue down to the right. You will next come to the fairly steep angled slab off rock, which if you are like me and you do not want to risk trying to walk down it, then try shuffling your way down it on your backside - I am making this slab of rock sound like it is huge and difficult to negotiate here, which it isn't really, but none the less you do need to be careful. Having now negotiated your way down the slab of rock, you should find yourself in a tiny pebbled area right next to the river and is where I set up to take Shots 3 and 4 shown above and Shot 5 shown on the left. There really isn't much room at all to work in this location, so it is probably best if you go down here on your own, or perhaps with one other photographer and is definitely not somewhere to go with a large group, unless you take it in turns to go down here of course. You should now have a great view both up and down the River Moriston from this point, with both banks all around you lined with naturally occurring Scots Pine trees. A wide but fast flowing river right at your feet, that cascades over and through a wide variety of rock formations. Until it finally disappears around a sharp right handed bend, hidden by a series of large, vertically slab sided rocks. With lots of other interesting rocky formations all around you and generally just a really good place, to spend several hours with your camera working the scene. In fact the last time I went here, I took along a sandwich and a small carton of juice and just sat there listening to the birds singing and drinking in the tranquil atmosphere of the place and generally thinking, Wow, isn't Scotland just one of the most amazing places on the planet to be, especially if you are a landscape photographer? If you then look up the river from the tiny pebbled area you are now stood on, you will see a wide rocky banked area of the river, that leads all the way up to another set of falls in the near distance, as shown in Shots 7 and 8 below and with several places, where the River Moriston flows both over and through the rocks. |
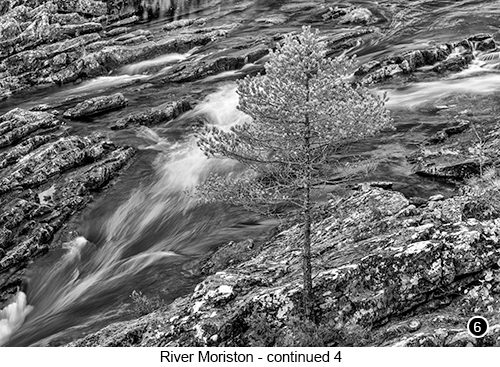
You will then also notice, where some of these rocky flow areas, have several very photographic little trees growing out of them, such as the one shown in Shot 6 on the right. Yet as I look at Shot 6 now, I realise that I didn't even give this little tree a second thought when I was there and photographing it and just assumed, that it was nothing more than a young sapling, which would continue to grow into much larger tree over time. But now as I study the shot in more detail, I am not so sure, because even though the tiny leaves look to be proportionate to the current size of the tree (about 3 feet tall), perhaps the real reason it is so proportionately tiny, is simply because it is trying to grow out of solid rock and therefore the nutrient levels, must be quite meager for it to survive. So perhaps to overcome these limitations, it has turned itself into a sort of naturally occurring Bonsai Tree or something, who knows? But whatever is happening with this tree, I knew as soon as I saw it, that it would look really good with the rocks and part of the river flowing directly behind it, so that is how I shot it to emphasize both these features. So when you have finished shooting down the river and the rocks and any close up detail shots you can find close by etc., if you now look further up the river towards the upper part of the falls, as shown in Shots 7 and 8 below, you will see a nice wide vista, with a backdrop of natural forest, which I think looks particularly good in the autumn. But to make the most of this upper part of the falls, you are either going to have to bushwhack your way up the right side of the river to get closer to it, or do as I did and stay where you are, but instead throw on your 70/200mm lens with an extender. |
 |
 |
So now that I have started to talk about lenses, let me take a moment to discuss what I believe to be the best focal range of lenses, that will allow you to get the most out of this undiscovered location - well when I say undiscovered, I mean undiscovered by us landscape photographers, but which now might be quite well known to kayakers. Firstly I would suggest that you definitely need to take along your widest angle zoom lens, of say 16/35mm or perhaps even a little wider if you have one. A medium zoom of somewhere in the region of 24/105mm (or 24/70mm) and a 70/200 with an extender, or perhaps even a 100/400mm, so you can push your reach out to 280mm and beyond. However, if you do not have this range of lenses at your disposal, then take what you can, but for your first visit at least, I would definitely lean towards the wider end of the range, as this type of lens suits this location. But as I said earlier, if you are one of the more intrepid types of landscape photographer. Then you could always try to bushwhack your way up to the upper part of the falls. But when I was last there, no one had tried this yet (not even the kayakers) and so I couldn't see any evidence that they had, so no path to follow. But if you do, then whatever view you might be able to get from up there, means you will probably be the first photographer to shoot it. Tip: If you have arrived here coming up the A887 for the South, then you may not be aware, that this river is in fact fed from the Dundreggan power generator reservoir, only about a half mile further upstream. Which means that the flow of water is always controlled. However, this can be both a good and a bad thing for us photographers. |
Because it means that if the reservoir is full, then even if there has been absolutely no rain for many days or even weeks, this river will still continue to flow at a really good level to generate electricity. The downside is, if the reservoir is really low, then no matter how much rain we have had over the previous days or weeks, you will not see it raise the water level in the river by even an inch, as you would expect it to. It is also worth noting here, that there can also be times up here in Scotland, when we get sustained periods of heavy rain, that can seem to last for several weeks at a time. Which means this relatively small reservoir, will eventually begin to overflow and the river will then become torrential for only a short period of time, as they try to dump all the extra water out of the reservoir as quickly as they can. |
|
 |
|
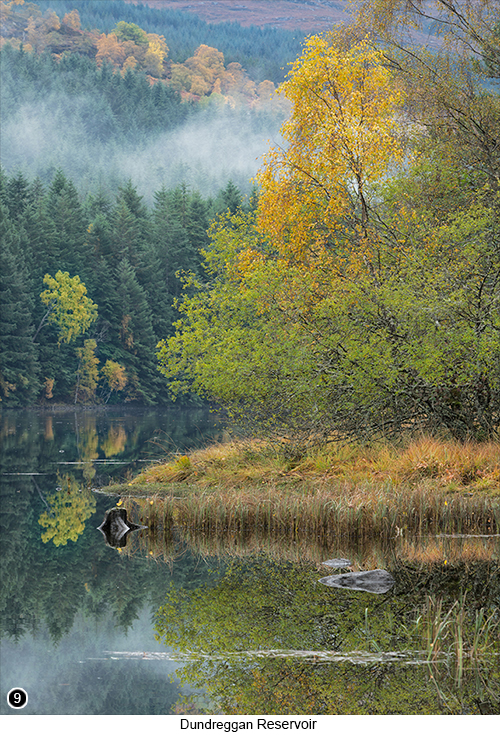
So I would suggest that you will just have to turn up here and see what the river is doing on the day you arrive, rather than spending your time planning to be here when you think it should be at its best. Which I know, makes this location seem a little more like potluck because of this. But because this river has such a controlled flow and the fact it is regulated over the course of a year, to produce the best continual and constant flow of electricity, means that they are always trying to keep the flow at the exact same height, day after day, no matter what the weather chooses to do. So even if all the other rivers in the area have been reduced to a trickle due to a sustained period of dry weather (which does happen occasionally in Scotland, believe it or not), this river will just look the same as it always does - outside of sustained freak conditions of course. If you now go back to your vehicle after you finish shooting the falls and continue driving North, back towards the Isle of Skye for about 3/4 of a mile. You will soon drive past the Dundreggan Falls Hydro plant buildings on your left and a couple of other layby parking areas also on your left. You will then quickly come to a sharp left hand bend, with the Dundreggan reservoir still visible through the trees on your left and where you will then see, another relatively sharp right hand bend, coming up towards you quickly in the near distance. Then, as you reach this next right handed bend, you will see a short, muddy little track, that leads down to the edge of the reservoir through some trees Street View and is where you will find, there is just enough off road parking for a couple of vehicles. So pull onto this short track, park your vehicle and then put on your rubber boots. If you walk down this short track to the edge of the reservoir, being aware that the mud and the leaves on this track, always seems to be very slippery, especially when the leaves are falling in autumn and which is definitely the best time to be shooting in this area. In fact all the shots on this page were taken in or around the autumn period. You will then arrive at the edge of this small tranquil loch and the view as shown in Shot 9 on the right. This loch whenever I have visited it, always seems to reflective or very close to it. Which I imagine is due to this small but deep body of water, being totally surrounded on all sides, by tall wind breaking trees and the glen walls. So unless you are unlucky enough to be here on a particularly windy day, you should be able to grab a few reflection shots of this reservoir and the surrounding forest. You might also be lucky enough to be here, when there is a nice layer of mist swirling through the trees, which also seems to happen quite often in this area and in fact all the way down the glen towards Loch Ness. But which especially seems to occur on those cold, crisp autumn mornings before the sun has risen high enough, to shine directly into the glen and warm up the air and disturb the surface of the water.
|
|
|
--Exif information for each of the numbered shots shown throughout this chapter --3 - Canon EF70-200 f2.8L IS USM + 1.4 extender, 0.8 Sec with -/+2 stop bracket, f/11 (3 shot focus stack), ISO 50, Focal Length 100mm, taken on 25th Sep at 12:10 --5 - Canon EF16-35/2.8L USM, 1/10th Sec, f/16, ISO 50, Focal Length 35mm, taken on 25th Sep at 12:56 --6 - Canon EF24-105mm f/4L IS USM, 1 Sec, f/18, ISO 50, Focal Length 80mm, taken on 20th Sep at 13:43 --7 - Canon EF70-200 f2.8L IS USM, 1 Sec, f/22, ISO 50, Focal Length 98mm, taken on 25th Sep at 14:14 --8 - Canon EF70-200 f2.8L IS USM + 1.4 extender, 1.3 Sec with -/+2 stop bracket, f/16 (2 shot focus stack), ISO 100, Focal Length 230mm, taken on 25th Sep at 14:26 --9 - Canon EF24-105mm f/4L IS USM, 1/30 Sec, f/16, ISO 100, Focal Length 32mm, taken on 20th Oct at 09:17 |
|
If you have enjoyed reading these 'Extra' chapters to my Guide Book and think you might also enjoy reading 79 more chapters across 270 pages, that also includes more than 340 Fine Art quality images, along with detailed descriptions and large scale maps to guide you to the exact location of where I took each and every one of them and which then goes onto discuss the techniques and tools I used to process them, but where everything is written in plain easy to understand English? Then please consider buying the Book. |
|